Sunday, November 17, 2013
I've re-arranged things...
If you'll look at the top of my blog, you'll see that I've put the best stuff on separate pages. Now you can find Hall of Shame, How to Clean and Oil Your Machine, Sewing Machine Tensions and Bobbin Winder Clutch, by clicking on the tab.
Sunday, October 27, 2013
Refurbished Sewing Machine Update
I've been able to sell all but one of my refurbished sewing machines. I only sold the drop-in bobbin Kenmore at my sewing machine yard sale, for $50.
Then I sold the other Kenmore for $100, the Montgomery Ward for $100, and the Riccar for $50, to the same person. She has about 15 ladies who sew cheerleader, drill team and ballroom dance costumes for her.
The White is the only one left. I'm asking $110 for it. I had a woman come to look at it, and it wouldn't work. We got it into the buttonhole system, and couldn't get it back out. Of course, as she was driving away, Karl (my DH) flipped the switch and it popped right out. I will de-gum it and make sure it won't do that again, before I sell it.
Update: The White has a new home. I got $100 for it.
All but one of my machines were bought by people I know through my job or quilt guild. I give a 30-day warranty with all of my refurbished machines. And I hope they will feel free to contact me if there are any problems.
Sunday, September 8, 2013
Refurbished Sewing Machines
I've been collecting and repairing machines for a few months, and have 6 ready to sell. I'm thinking about having a sewing machine garage sale. Here's what I've got...

I've written a list for each machine that points out it's positive and negative points. Here's a closer look at each one. You can click on the photo to get a bigger image.
So, what do I look for in a thrift store machine?
#1 does it have an oscillating hook system. Yes, I'm prejudiced, but am softening a bit.
#2 does it have all of its parts? hook, bobbin case, presser foot, foot control, needle plate, sew table, etc.
#3 does it run and function like it should? We bought one that was missing its back-stitch mechanism, and was too old to get a replacement.
#4 Has it been knocked or dropped, and is the race intact? If the race, or ledge that the hook sits on, is broken off, it might sew but will make a terrible banging sound. If it's been knocked or dropped, it may have some bent shafts or broken internal parts.
We can tweak things like a burr on the hook or the timing (unless its been scrambled beyond repair). We can clean up the old gummy oil, most of the time. Some machines would take major surgery to clean up the old oil, and it wouldn't be cost effective. I'm having a bit of trouble with noisy Kenmores. I know they have a rattle, but these are extra loud. I haven't figured out how to quiet them, yet.

I've written a list for each machine that points out it's positive and negative points. Here's a closer look at each one. You can click on the photo to get a bigger image.
 | |
| Bernette Model #715 Oscillating hook, Bernette (made for Bernina), has it's sew table, and a good variety of stitches. |
 |
| The logo washed off of the front, so I didn't dare wash off the logo on the back. It's the only way to tell what it is. |
 |
| It sewed off really nice. |
 | |
| Kenmore Model #158-16031 This is a beauty! The one draw-back on this one is that it's a flat-bed. It has some nice stitches built-in, oscillating hook, and clean. |
 | ||||
| It sewed off well, but I ran off the edge a bit. |
 |
| Kenmore Model #158-17800 This one, I probably wouldn't have bought, just because it's a drop-in bobbin, but my DH brought it home. It doesn't have any cams, and the buttonhole system is missing parts for it to work. |
 | |||
| It sewed off pretty good, but I haven't cut off the top row of stitches, which were before I had the tensions balanced. |
 |
| Montgomery Ward Model #UHT J1930 Lots of stitches on this one! And it has a few accessories, oscillating hook, and a nifty spring-loaded sew table. |
 |
| Sewed off well, too. |
 |
| Riccar Model #333 No bells or whistles, oscillating hook, carry case. I won't ask too much for this one, but I think it would be just fine with the right person. |
 | |
| It only has straight and zig-zag stitches, but what a solid machine! |
 |
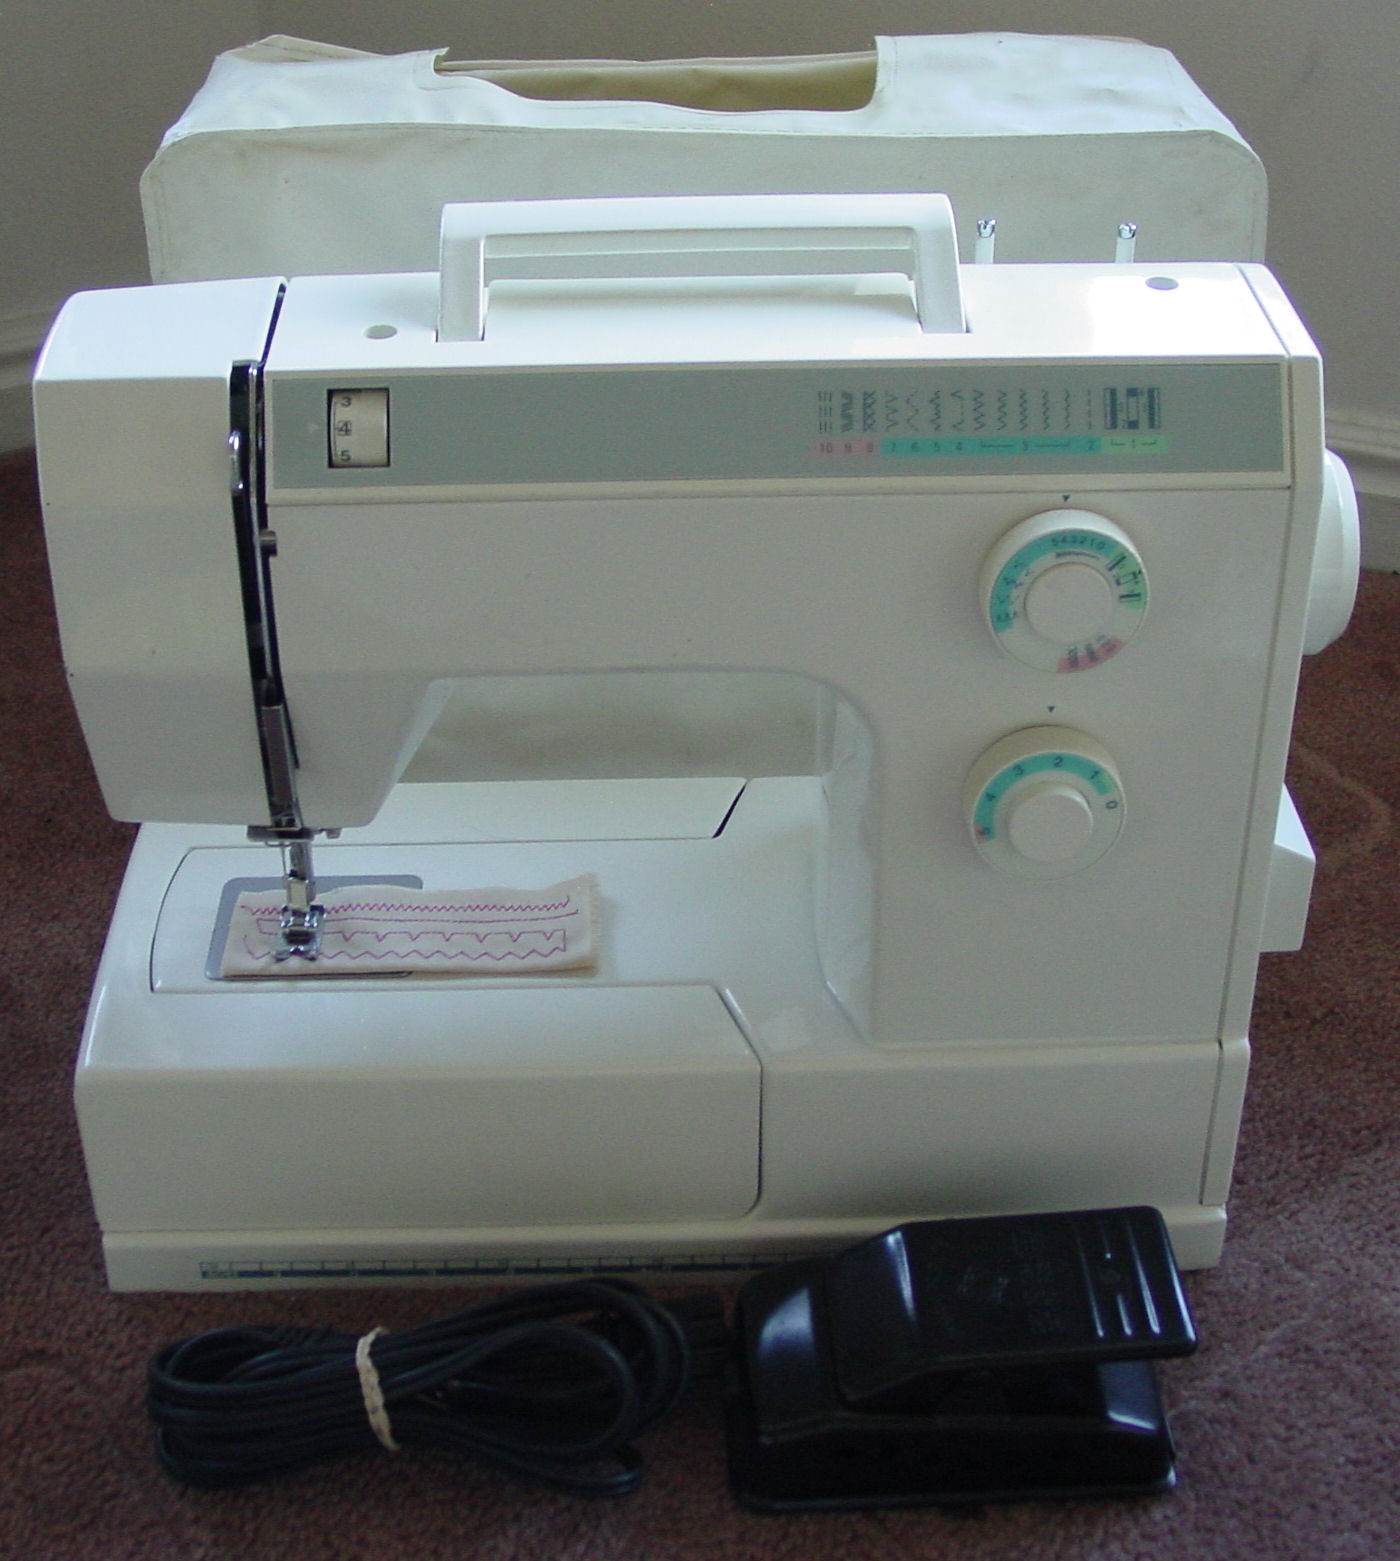
| White model #701 This is another one I wouldn't have bought, but DH did. And I'm glad he did! It has some fun engineering! The knob on the lower, left side releases a sew table in the front if you turn it one way, and another sew table in the back if you turn it the other way. In the top, it has its dials and knobs for selecting stitches and even has a buttonhole system that you can set the size. |
 |
| Lots of stitches on this one, and it sewed off surprisingly well for a rotary hook. |
So, what do I look for in a thrift store machine?
#1 does it have an oscillating hook system. Yes, I'm prejudiced, but am softening a bit.
#2 does it have all of its parts? hook, bobbin case, presser foot, foot control, needle plate, sew table, etc.
#3 does it run and function like it should? We bought one that was missing its back-stitch mechanism, and was too old to get a replacement.
#4 Has it been knocked or dropped, and is the race intact? If the race, or ledge that the hook sits on, is broken off, it might sew but will make a terrible banging sound. If it's been knocked or dropped, it may have some bent shafts or broken internal parts.
We can tweak things like a burr on the hook or the timing (unless its been scrambled beyond repair). We can clean up the old gummy oil, most of the time. Some machines would take major surgery to clean up the old oil, and it wouldn't be cost effective. I'm having a bit of trouble with noisy Kenmores. I know they have a rattle, but these are extra loud. I haven't figured out how to quiet them, yet.
Tuesday, September 3, 2013
Drop-in Bobbin Case Position

Here's a picture of an open Drop-in Bobbin System. This is a picture I took of a Bernette, but is similar to a Singer 7422. The bobbin holder (sometimes called a bobbin basket or bobbin case) is in its place in the top picture. You shouldn't have to loosen any screws to remove the bobbin holder. But if it's hard to get out, turn the hand wheel until the opening in the hook is just below the retention finger. The hook is the metal ring that goes around when you turn the hand wheel. To put the bobbin holder back in, there's a small bump at the front, that can bounce on the spring. And a bigger, flat bump on the opposite side that the finger will touch.
Some other sewing machine mechanic wanted to charge $40 to put a bobbin holder in!?!? You can do this!!!
Thursday, July 4, 2013
Take A Closer Look At Your Bobbin
The bobbin is a simple thing, but it can cause some big problems. Here are a few examples...
 This bobbin has multiple layers of thread wound onto it. Yes, it's frugal, but have you thought about what's going to happen when one layer comes to an end or gets tangled under another layer? It may cause the needle to jerk, and put a burr on your hook and/or break a needle.
 This bobbin has been wound very loosely. It won't feed evenly, and your tension will look very bad.
 This bobbin has a loose thread, so instead of spinning smoothly inside the bobbin case, it will rattle and jerk and give you a bad stitch.
 This bobbin also has a loose thread that got wrapped around the outside. It cannot give you a smooth stitch.


So, pay attention to the little things!
Sunday, June 23, 2013
How To Use a Seam Jack
If you're sewing over bulky seams, a "seam jack" can be your best friend.
A "seam jack" or "jeans jack," can be purchased where sewing machine accessories are sold. The middle one is Bernina's “height compensation tool,” which you can buy at your local Bernina dealer for about $1.00. Or you can fold some light-weight cardboard or plastic to a thickness of 1/16” to 3/16.”

The reason we have a hard time getting a good stitch, or with breaking needles on thicker fabrics, is because the presser foot tilts as you go over a thick seam. A seam jack helps keep the presser foot even, so that the connection to the feed dogs underneath is even.
#1. As the presser foot tilts, it loses its grip on the feed dogs, and the needle gets pulled into the presser foot or needle plate.

#2. As you approach a thick seam, put the needle in the down position and lift the presser foot. Insert the seam jack right behind the needle, and let the presser foot back down. Sew across the seam, and stop with the needle in the down position.

#3. When the presser foot is sitting evenly, on top of the seam, and about to start tilting forward, as it goes down the other side of the seam, put the needle in the down position, lift the presser foot and remove the seam jack.

#4. Place the seam jack under the front of the presser foot, but only under one side.

#5. Let the presser foot down, and continue sewing until the back of your presser foot is ready to sew off of the seam.

Monday, May 27, 2013
Mechanic Hands
I enjoy being a sewing machine mechanic,
but it sure is hard on my hands.

I put a screw driver through my pinky fingernail,
and smashed my thumbnail.

Some days they just don't get clean,
no matter how many times I wash them.
It's a good thing I love my job!
Thursday, April 18, 2013
The Wrong Oil
I'm working on an old White sewing machine. DH got it for the foot control, but I want to try to fix it up to sell. The problem seems to be that the previous owner used the wrong kind of oil.
It took DH's muscles to un-screw the center knob. And my sons helped me get the handwheel off. After trying to pull it off, we tried to pry it off with a screw driver, which didn't work. Then we finally positioned a screw driver on the inside metal casing, and smacked it with a hammer. That worked!

The "Before" picture is fuzzy, but you can see the red-ish, sticky, old oil. That is what old oil or the wrong kind of oil looks like, and it feels tacky to the touch. It's just like glue.

To remove the old, gummy oil, I put some WD-40 on it and scrubbed it with an old toothbrush. It didn't get all of it off, so I used a very fine sandpaper to get the rest off. The inside of the casing on the handwheel also needed scrubbing as did the center knob and the position ring.
So, what kind of oil should you use? Only "sewing machine oil." That doesn't include 3-in-1 oil, engine oil, olive oil, or FAX machine oil. And, as you can see, it doesn't include WD-40. We only use WD-40 to REMOVE the old oil.
Saturday, February 16, 2013
Sewing Machine Tensions
Lets talk about tensions. When a machine comes into the shop, no matter what the problem is, the customer will usually say, "it's the tension." If the timing is off, "it's the tension." If there's a burr on the hook, "it's the tension." If the needle is in backwards, "it's the tension." You get the idea.
I'll do a run through on how we balance the tensions at the shop.
Before we can work with tensions, we clean and oil throughout the whole machine. It's especially important to clean and oil your bobbin area before working with the tensions. That's something you should be comfortable doing yourself.
When you thread your machine, the presser foot has to be in the up position, to open the upper tension disks. If the presser foot is down, the tension disks are closed tight, and the thread can't get into them. When that happens, your fabric will have loops on the bottom, like this...

You can click on the pictures to make them bigger.
Next, make sure there's no lint in the upper tension disks or inside the bobbin case. You can sweep the lint out with your lint brush.
Then set your upper tension dial on "normal." If you don't have a "normal" setting marked on the dial, set it at 3.
Correctly thread your machine, top and bobbin. Put a light colored thread in the bobbin and a medium to dark colored thread in the top.
Set your machine to do a medium zig-zag (unless your machine is just a straight-stitch machine). On most machines it's 3 on the width and 2 on the length.
Sew on a light colored, good quality, cotton fabric for about 6."

If the bobbin thread is pulling to the top, tighten the bobbin case tension by turning the little screw to the right. Remember, "righty tighty, lefty loosey." Here's some pictures of bobbin case tension screws...

If the top thread is pulling to the bottom, that's what you want it to do. But, you only want the top thread to be a "tick" on the back. If it's really pulling to the back, loosen the bobbin case tension by turning the little screw to the left.
After working with the bobbin case tension, if you're still not sewing well, try adjusting the top tension. It works just opposite of the bobbin case tension. If the thread is still pulling to the top, loosen the upper tension. If the thread is still pulling to the bottom, tighten the upper tension.
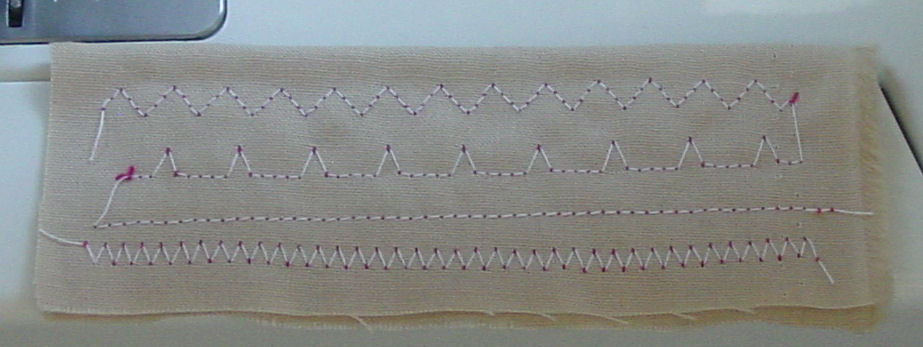
Here's my nearly perfect sew-off sample.

If you're still not sewing well, it may not be the tensions, and you may need to take your machine to the shop.
I'll do a run through on how we balance the tensions at the shop.
Before we can work with tensions, we clean and oil throughout the whole machine. It's especially important to clean and oil your bobbin area before working with the tensions. That's something you should be comfortable doing yourself.
When you thread your machine, the presser foot has to be in the up position, to open the upper tension disks. If the presser foot is down, the tension disks are closed tight, and the thread can't get into them. When that happens, your fabric will have loops on the bottom, like this...

You can click on the pictures to make them bigger.
Next, make sure there's no lint in the upper tension disks or inside the bobbin case. You can sweep the lint out with your lint brush.
Then set your upper tension dial on "normal." If you don't have a "normal" setting marked on the dial, set it at 3.
Correctly thread your machine, top and bobbin. Put a light colored thread in the bobbin and a medium to dark colored thread in the top.
Set your machine to do a medium zig-zag (unless your machine is just a straight-stitch machine). On most machines it's 3 on the width and 2 on the length.
Sew on a light colored, good quality, cotton fabric for about 6."

If the bobbin thread is pulling to the top, tighten the bobbin case tension by turning the little screw to the right. Remember, "righty tighty, lefty loosey." Here's some pictures of bobbin case tension screws...

If the top thread is pulling to the bottom, that's what you want it to do. But, you only want the top thread to be a "tick" on the back. If it's really pulling to the back, loosen the bobbin case tension by turning the little screw to the left.
After working with the bobbin case tension, if you're still not sewing well, try adjusting the top tension. It works just opposite of the bobbin case tension. If the thread is still pulling to the top, loosen the upper tension. If the thread is still pulling to the bottom, tighten the upper tension.
Here's my nearly perfect sew-off sample.

If you're still not sewing well, it may not be the tensions, and you may need to take your machine to the shop.
Saturday, February 9, 2013
Quilt Guild Presentation
This past week, I was asked to come to 2 quilt guilds to give a sewing machine maintenance class. One guild wanted a hands-on class where they opened their machines and did what maintenance they could on them. And I took my camera, but forgot to take pictures. Dang! The other guild just wanted a lecture/demo. There were 7 students in the hands-on class, and about 30 at the lecture/demo. It was great! I love teaching these classes!
One question that was asked at both classes was, "what gets done when we bring our machine in for a service?" So, I've made a list.
When you bring your machine in for a full service, here are some things that get done:
1. Clean and oil throughout, which can get very deep. We remove some, or all of the outside of the machine, and use an air compressor to blow out the lint. We oil where metal rubs on metal, and put grease on certain gears and tracers.
2. Service the motor. Older machines have carbon motor brushes that wear out and may need to be replaced. We oil the bearings at each end. In addition, we clean the motor’s commutator (or armature) when it’s accessible. Then blow the carbon and lint out of the motor when it is open.
3. Check the belts. Belts need to be replaced when they start to shred, get deep cuts in them, or get saturated with oil.
4. Check the electrical components. Foot controls and cords on older machines may be a fire hazard. On newer machines, circuit boards and stepping motors need to be checked. We also make sure the lights are working properly.
5. Check for mechanisms that have been gummed-up with old oil. When necessary, we use a solvent to remove the old oil, then re-oil.
6. Replace or repair any broken parts.
7. Polish the burrs and scratches off of the hook and needle plate, if needed.
8. Replace the needle.
9. Check and set the timing. We make sure the needle, hook and feed dogs are working together to make a good stitch. Never try to adjust the timing yourself! There are too many variables, and you may just scramble your machine.
10. Balance the tensions and do a sew-off sample.
11. Clean the outside of the machine.
What To Bring With Your Machine When It Needs a Service:
1. Foot control and power cord (these need to be checked, too)
2. Standard presser foot. This is the foot that can sew all of the stitches on your machine, and has a nice flat bottom. We need this foot to do a good sew-off sample.
3. Bobbin case (so we can balance the tensions)
4. The right bobbin
5. Thread (if a particular thread is giving you trouble)
6. Embroidery module and hoop, if it's an embroidery machine
7. Please write what problems you are having on the service order, and if you’d like to include a full service.
What NOT to bring (because we may loose them):
1. Accessory case and accessories
2. Carry case, bag, box or crate
3. Walking foot or other specialty feet
4. Thread (unless the thread is giving you trouble)
5. Snap-on sew table
If you are still having problems after the service, please bring your machine back right away, so we can sit down with you, and figure it out.
Monday, January 28, 2013
Bobbin Winder Clutch
Sometimes, if you're working with an older sewing machine, your bobbin winder won't disengage, and the needle will go up and down while you're trying to wind a bobbin. This can be caused by 2 things. #1) you've got some old oil on the shaft inside that needs to be removed. Or #2) the ring under the bobbin winder clutch is in the wrong position. Here's how to fix it...

Here's a picture of a bobbin winder clutch. It's on the handwheel of this old Kenmore. First, loosen the small screw on the center knob. You don't have to take it all the way out, just loosen it. Then twist the center knob to the left (righty-tighty, lefty-loosey) until it comes off. This is a picture of what you'll see under the knob. Can you see the metal ring that's sitting on the center shaft? Remove it.

You may need to take the top lid and/or the side panel off to allow the handwheel to move in and out. If you're not sure you can get the belt back on correctly, you don't need to take the belt off, just loosen the outer panels so you can move the handwheel on it's shaft, like this...

Can you see how the center shaft has moved back inside, as I push the handwheel out? Use some "solvent" (WD-40) to remove the old, gummy oil on the shaft. Squirt it inside the hole and work the handwheel around until the gum is dissolved. Then wipe out as much of the solvent as you can. If you have a can of air, you can blow it out -- we use an air compressor at the shop. Also use the solvent to wipe the old oil off of the metal ring and center knob.
Put 2 drops of oil on the shaft and put the machine back together.
The metal ring under the knob will have 2 or 3 raised nubs on the inside.
 The raised side of the nubs should be facing outward. Put the ring in place, with the nubs in the slots on the shaft. (Take a closer look at the second picture above.) Then screw the center knob back on and tighten the little screw. You should be able to release and re-tighten the center knob.
Run the machine and see if it's doing what it's supposed to do.
If the machine isn't working well with the ring in its current position, turn it counter-clock-wise one position. Screw the center knob back on and tighten the little screw.
That should take care of it!

Here's a picture of a bobbin winder clutch. It's on the handwheel of this old Kenmore. First, loosen the small screw on the center knob. You don't have to take it all the way out, just loosen it. Then twist the center knob to the left (righty-tighty, lefty-loosey) until it comes off. This is a picture of what you'll see under the knob. Can you see the metal ring that's sitting on the center shaft? Remove it.

You may need to take the top lid and/or the side panel off to allow the handwheel to move in and out. If you're not sure you can get the belt back on correctly, you don't need to take the belt off, just loosen the outer panels so you can move the handwheel on it's shaft, like this...

Can you see how the center shaft has moved back inside, as I push the handwheel out? Use some "solvent" (WD-40) to remove the old, gummy oil on the shaft. Squirt it inside the hole and work the handwheel around until the gum is dissolved. Then wipe out as much of the solvent as you can. If you have a can of air, you can blow it out -- we use an air compressor at the shop. Also use the solvent to wipe the old oil off of the metal ring and center knob.
Put 2 drops of oil on the shaft and put the machine back together.
The metal ring under the knob will have 2 or 3 raised nubs on the inside.

Run the machine and see if it's doing what it's supposed to do.
If the machine isn't working well with the ring in its current position, turn it counter-clock-wise one position. Screw the center knob back on and tighten the little screw.
That should take care of it!
Saturday, January 26, 2013
Tensioners for Bobbin Winding


House Call
My neighbor just called me to come check her sewing machine. She has a Bernina 801. Great little machine! Her complaint was that it wasn't feeding the fabric through. When I got there, here's a list of what I found.
1. The feed dog drop switch was set for "darning," but the feed dog height was also low. So we moved the switch to "sew," and raised her feed dog height.
2. The needle was in backwards. We put the needle back in the right way, with the flat side to the back.
3. The bobbin tension was way too tight, and the upper tension was set loose. So we put the upper tension on its "normal" setting, and loosened the bobbin tension. Then I did a sew off sample, and balanced the tensions by adjusting the bobbin tension.
4. When I asked for a different color thread for the top thread, she handed me some "hand quilting" thread. I told her to NEVER use "hand quilting" thread on a sewing machine. You CANNOT get a good stitch with "hand quilting" thread. And you may get a burr when it tangles and pulls the needle into the hook.
Subscribe to:
Posts (Atom)